Category Archives: Protocoles de laboratoire

Dans cette catégorie, vous trouverez des protocoles de laboratoire, accompagnés le plus souvent d’images et de vidéos.

DNA Purification

<!doctype html>


DNA Purification
 

Purifying DNA starting from a frozen C. elegans stock

Day 1: defrosting the stock

Defrost the stock into an agar plate.

Freezing a new strain of C. elegans

The strains I am working with should be isogenic but to increase the probability of working with an isogenic strain, I created
a new strain originating from a single worm. Pick a single worm into a new fresh agar NGM plate. Let it move away from the point
of deposition. Pick it again into a new fresh plate. This procedure of first picking into a plate and then into another makes sure
that no other worms or eggs are co-picked with the single worm of interest. Let the single worm populate the whole plate and
chunk the plate into 2 or more plates. This strain is now called differently, starting with SX, the code given to the Miska lab.
Freeze of of the plates.

Always freeze 5 vials. White plug in one of the 5 red caps. New strain from single worm is called
SX…. . SX is the Miska lab designation in the world. One of the tubes will be thawed tomorrow to check
that the freezing worked. One tube will be put in liquid nitrogen for long term storage. Three tubes will be
put in the -80 C freezer for mid term storage. Take a 15 ml Falcon tube, M9 medium, freezing buffer 2X.
Final volume of vial: 1 ml, so need 2.5 ml of freezing buffer. Pour 3.2 ml M9 on plate. Take 2.5 ml back with
pipetboy and 5 ml serological pipette. Put in Falcon. Add 2.5 ml freezing buffer to falcon. Pipet 1 ml of
solution in each vial. Transfer the vials into a polystyrene box. Tape the polystyrene box shut. Put the polystyrene box
in the -80 C freezer. The box allows the temperature decrease to be slower. Tomorrow, put test tube in tap water for 5 min.
Pour on plate and check that worms are alive. Put other tubes in inbox (4 tubes) and email lab manager. New strain SX…. is ready.

Day 4: pick worms into new plate

Pick a few worms into a fresh agar plate.

Day 7: bleach gravid adults

Once many gravid adults are present on the plate, bleach them and grow the eggs overnight at -20 C on a rotating wheel.

Before starting

Prepare 50 ml of bleach solution in a 50 ml Falcon tube: 4mL 10M NaOH, 3mL Sodium hypochlorite (stored in the cold room), 43mL H2O. The bleach solution can be stored at room temperature for one month.

Bleach in a tube

  1. Use C. elegans plates that have many gravid hermaphrodites (the eggs only will resist to the bleach treatment). Wash the plates with M9 solution: pipet M9 solution across the plate several times to loosen worms and eggs that are stuck in the bacteria. Collect the M9+worms solution in a 15 ml Falcon tube. Top up the volume to 14 ml M9.Tip: Adult hermaphrodites have a tendency to stick to the walls of plastic pipettes. To avoid this issue when harvesting the worms, you can: (i) add a small amount of detergent (NP40 0.005% or tween) to the M9 used to harvest the worms; or (ii) pre-wet the plastic pipette in M9+detergent; or (iii) use glass pipettes.

    Tip: Pipette gently to avoid collecting bits of agar together with the worms.

  2. Wash the animals three times (or until the worm suspension is clear of bacteria) with 14 ml M9. To do so, centrifuge the animals at 2,000 rpm for 2 minutes, discard the supernatant with the vacuum pump, re-suspend the worm pellet in 14 ml M9. After the last wash, do not re-suspend the worm pellet in M9 and proceed to step 3.
  3. Add 4 mL of bleaching solution to the worm pellet and immediately proceed to the next step.Optional: depending on the number for worms/level of contamination, you can increase the volume of bleach solution from 4 ml to 6 ml. You can also use stronger bleaching solution (2.5mL NaOH 10M, 7.5mL Bleach, 40mL H2O). The standard conditions should work most of the time, however.
  4. Vortex the tube for 6 minutes. Then quickly check the mixture under a dissecting scope (through the flacon tube). The worms should be dissolved and only eggs should be visible. If so, immediately proceed to the next step.Note: If necessary, you can vortex 2 additional minutes. Do not over bleach though! If the eggs stay too long in the bleach solution, they will die.
  5. Add some sterile M9 to the mixture of dissolved worms/eggs in bleaching solution (up to 14 ml final volume). Spin the tube for 1 minute at 2,000 rpm to pellet the eggs. Discard the supernatant with the vacuum pump and immediately proceed to the next step.
  6. Resuspend the egg pellet in 14mL sterile M9. Vortex the mixture for five seconds, holding the tube horizontally. Spin the tube for 1 minute at 2,000 rpm to pellet the eggs. Discard the supernatant with the vacuum pump. Repeat this step three times.
  7. After the last wash, resuspend the egg pellet in the desired volume. You can either pipette the eggs onto an NGM plate (use a glass pipette) or leave the eggs in liquid suspension (200 ul of sterile M9 recommended) and place them on the rotating wheel (20°C room) overnight (you will have synchronised L1 on the next day).

Day 8: transfer L1’s onto fresh agar plate

Day 10: freeze-crack L4 worms

  1. Harvest the worms from the plate into a 15 ml Falcon tube. Add 16 ml of M9 + Tween (not necessarily sterile) to the plate using a serological pipette and a pipetboy.
  2. Pipet up and down a few times.
  3. Transfer the wormy solution into the 15 ml Falcon tube.
  4. Centrifuge the tube at 2000 rpm for 2 min.
  5. You should observe a worm pellet and a supernatant that does not contain swimming worms.
  6. Remove the supernatant using a glass Pasteur pipette inside a non-filter tip attached to a vaccum pump.
  7. Dissolve the worm pellet in M9 up to 14 ml. The M9 solution does not need to be sterile.
  8. Repeat steps 4-7 three times.
  9. Centrifuge the tube at 2000 rpm for 2 min.
  10. Remove all the supernatant as to leave 100 ul of worm pellet.
  11. Freeze-crack the worms in the Falcon tube in liquid nitrogen for 20 seconds holding the tube with tweezers.
  12. At this stage, you have the possibility to store the tube at -80 C for later use.
  13. Leave the cracked worm pellet to defrost at room temperature.
  14. Start the DNeasy kit protocol.
  15. Add 360 ul ATL buffer to the tube.
  16. Transfer the tube to a 1.5 ml eppendorf tube.
  17. Add 40 ul proteinase K to the tube.
  18. Leave the tube overnight on a shaker (550 rpm) at 56 C.

Day 11: purify DNA

Centrifugation to get rid of debris + DNeasy protocol

  1. Centrifuge at 8000 g for 1.5 min.
  2. Transfer the supernatant to a new tube
  3. add 4 ul RNAse A
  4. vortex a bit
  5. leave 2 min at RT
  6. vortex
  7. add 400 ul AL
  8. vortex
  9. add 400 ul EtOh to tube.
  10. Vortex.
  11. load on column
  12. centrifuge 8000 g for 1 min
  13. discard flow-through and tube
  14. place column onto new tube
  15. add 500 ul AW1
  16. centrifuge 1 min at 8000 g
  17. discard flow-through and tube
  18. place column into new collection tube
  19. add 500 ul AW2
  20. centrifuge 3 min at 20,000 g
  21. discard flow-through and collection tube
  22. centrifuge 1 min at 20,000 g
  23. discard flow-through and collection tube
  24. place column into 1.5 ml tube
  25. add 100 100 mM Tris pH 8, leave 1 min at RT
  26. centrifuge 1 min at 8000 g

Nanodrop

Measure the nucleic acid concentration using Nanodrop.

Lift pedestal.
Clean sample area.
Drop pedestal.
Touch screen.
-> Nucleic Acids -> dsDNA

Instrument self-test…
Lift pedestal.
Clean pedestal.
Load blank.
Lower arm.

Export Nanodrop results onto USB stick.

Qubit

Measure the dsDNA concentration using Qubit.
Use low sensitivity dye (BR: broad range) dilute 200x reagent in buffer to give working solution prepare two
standards tubes in Qubit tubes

  1. standard 1: 190 ul working solution + 10 ul standard aliquot
  2. standard 2: 190 ul working solution + 10 ul standard aliquot
  3. sample: 190 ul working solution + 10 ul sample
    Qubit results for sample: X ng/ul
    Export Qubit results onto USB stick.

Agarose gel

Agarose gel: 250 ml flask. Add 0.45 g agarose in 60 ml TAE in measuring cylinder.
Tape container. Put comb in container. Microwave 1 min. Add 0.6 ul ETBR to solution.
Stir. Pour in 4 C room. Add water in flask. Stir. Pour through white material for ETBR. Wash flask with water.
Remove tape. Put gel in container. Add 5 ul ladder. Add 2 ul loading buffer to 5 ul DNA sample and load into gel.
Turn on machine on right. 150 mV, 400 mA, 30 min. Check run every 10 minutes.
Put gel in Imager. Open Image Lab. New Protocol.
Position gel, zoom in/out. Start Protocol. Image is ready on computer.
Invert contrast, change contrast, print image. Don’t touch the computer without gloves. It is contaminated.

Thanks to Jérémie Le Pen and others from the Miska lab for the invaluable advice.


Making agar bridges for electrophysiology

Ingredients

  • agarose
  • potassium chloride (KCl; MW = 74.54 g/mol)
  • glass capillaries
  • ethanol burner
  • syringe

Procedure

  1. Prepare bent capillary tubes. Alight an ethanol burner by dipping the wick in EtOH, e.g. filling a 1.5 ml tube (eppendorf) with ethanol and dipping the wick in it. Hover the capillary (at 1/3 of its length) over the fire and keep pushing on the short end with a pen until the capillary is bent at a right angle.
  2. Prepare a 20 ml solution at 1% agarose. Weight 0.2 g agarose and dissolve it in 20 ml ddH2O in a 50 ml Falcon tube.
  3. Weight the appropriate amount of KCl in order to achieve a final concentration of 3 M. I need:
    0.020 l x 3 mol/l = 0.06 mol KCl
    0.06 mol x 74.54 g/mol = 4.4724 = 4.47 g KCl
  4. DO NOT ADD THE KCl TO THE AGAROSE SOLUTION BEFORE MICROWAVING THE AGAROSE!!! (COULD CAUSE SPARKS IF KCl IS MICROWAVED)

  5. Microwave the agarose solution.
  6. Add the KCl and dissolve it.
  7. Aspire the solution with the syringe.
  8. Fill bent capillary tubes with the solution. Tip: hold the connection between capillary and syringe in order to prevent the mixture from spilling around the capillary. Quickly dry capillaries. Trim the ends of capillaries with a diamond cutter.
  9. Capillaries should not contain any bubbles.

    Storage

    Store the capillaries, i.e. agar bridges, at room temperature in a 3 M KCl solution.

Patch-clamp

Day 1: split cells

Matrigel 6 cm diameter Petri dishes:

  • Dilute matrigel 100-fold with DMEM without any additives
  • Pipet 3 ml of diluted matrigel on a 6 cm diameter Petri dish
  • Incubate for 30 min at 37°C

During the incubation, trypsinise a T75 flask of GLUTag cells and resuspend them in 10 ml medium (50/50 fresh/conditioned media).
Remove the matrigel from the dish and add 4 ml full DMEM medium.
Add 2.5 ml of the resuspension in the dish and incubate overnight at 37°C/5% CO2.

Day 2: transfect cells using Lipofectamine-2000

  • 1 hour before transfection, replace the full DMEM medium. Don’t forget to warm the medium in the 37°C water bath.
  • Prepare the plasmid and Lipofectamine-2000 seperately in OptiMEM. Use 3 ug of plasmid and 12 ul of Lipofectamine-2000. Eg. if the plasmid concentration is 1.5 ug/ul:
    1. Pipet 298 ul OptiMEM in a 1.5 ml eppendorf tube labelled “P” (“P” stands for “plasmid”)
    2. Pipet 288 ul OptiMEM in a 1.5 ml eppendorf tube labelled “L” (“L” stands for “Lipofectamine-2000”)
    3. Pipet 2 ul pDNA in the “P” tube.
    4. Pipet 12 ul Lipofectamine-2000 (straight from the fridge) in the “L” tube. Do not mix the lipofectamine-2000 by pipetting up and down. Lipofectamine is sticky and will stick to the pipette if this is done!
  • Let the two tubes sit for 10 min in the hood.
  • Add the tube “P” content to the tube “L” (never do the reverse, the less you pipette Lipofectamine-2000, the better)
  • Incubate for 20 min in the hood
  • Add the 600 ul mixture to the 6 cm diameter dish dropwise.
  • Incubate overnight at 37°C/5% CO2.

Transfer transfected cells into smaller recording dishes

This step is necessary in order to go from a confluent layer of cells to single cells scattered on a dish that are amenable to being patch-clamped.

  1. Warm up medium, PBS and trypsin in the water bath.
  2. Wash cells with 10 ml PBS.
  3. Trypsinise for 3-5 minutes with 2 ml trypsin.
  4. Stop trypsinisation using 6 ml DMEM.
  5. Triturate 30 times.
  6. Centrifuge on a table-top centrifuge at 700 rpm for 5 min at room temperature.
  7. Throw away supernatant (this step gets rid of the trypsin)
  8. Resuspend in 10 ml DMEM and triturate 30 times.
  9. Transfer 5 ml in a new tube and add 45 ml DMEM.
  10. Pipet 2 ml in 3.5 cm diameter dishes for patch-clamp experiments the following day.
  11. Each dish contains 0.5 x 2/50 = 0.5 x 1/25 = 0.5 x 0.04 = 0.02 = 2 % of the initial cells. It is advisable to make another two-fold dilution to get 1% of the initial cells on a few dishes in case the former dilution is not strong enough.

Day 4: patch-clamp

Culturing GLUTag cells

Starting point: confluent T75 flask containing stuck GLUTag cells and 20 ml DMEM medium

All steps are undertaken in a hood!

Day 1: Splitting a confluent flask

  1. Label one 50 ml falcon tube with “condition” and one with “rubbish”
  2. Transfer the DMEM from the flask into the falcon labelled “condition”
  3. Wash cells with 10 ml PBS and transfer the dirty PBS into the “rubbish” tube
  4. Add 3 ml trypsin to the flask and leave it in the incubator for 3-5 min
  5. Check under the microscope that the cells have detached
  6. Add 5 ml fresh medium to stop the trypsinisation reaction
  7. Spin the cells down at 600 rpm for 5 min
  8. Chuck the supernatant
  9. Resuspend the cells in 5 ml fresh medium and triturate them 20 times with a 5 ml stripette (Note: using a 5 ml stripette rather than a bigger-volume one will help separate the cells due to the narrower aperture of the pipette)
  10. Add 5 ml condition medium from the “condition” tube to the resupsended cells
  11. Add 3 ml of the resuspension to a new T75 flask containing 17 ml fresh DMEM medium
  12. The other 7 ml can be used to seed Petri dishes for use in experiments, e.g.: calcium imaging, electrophysiology, secretion experiments, transfection, etc.

Day 3: Changing medium

Exchange 10 ml supernatant for 10 ml fresh DMEM medium

Day 5: Splitting a confluent flask

Refer to Day 1.

Cristian Riccio, Institute of Metabolic Science, University of Cambridge

Acknowledgments

Thanks to Dr. Edward Emery and Dr. Frank Reimann from the Institute of Metabolic Science for their contribution to the establishment of this protocol.

Production of selenomethionine derivative of a protein

Day 1: Inoculate overnight culture

Autoclave 2 x 200 ml LB medium.
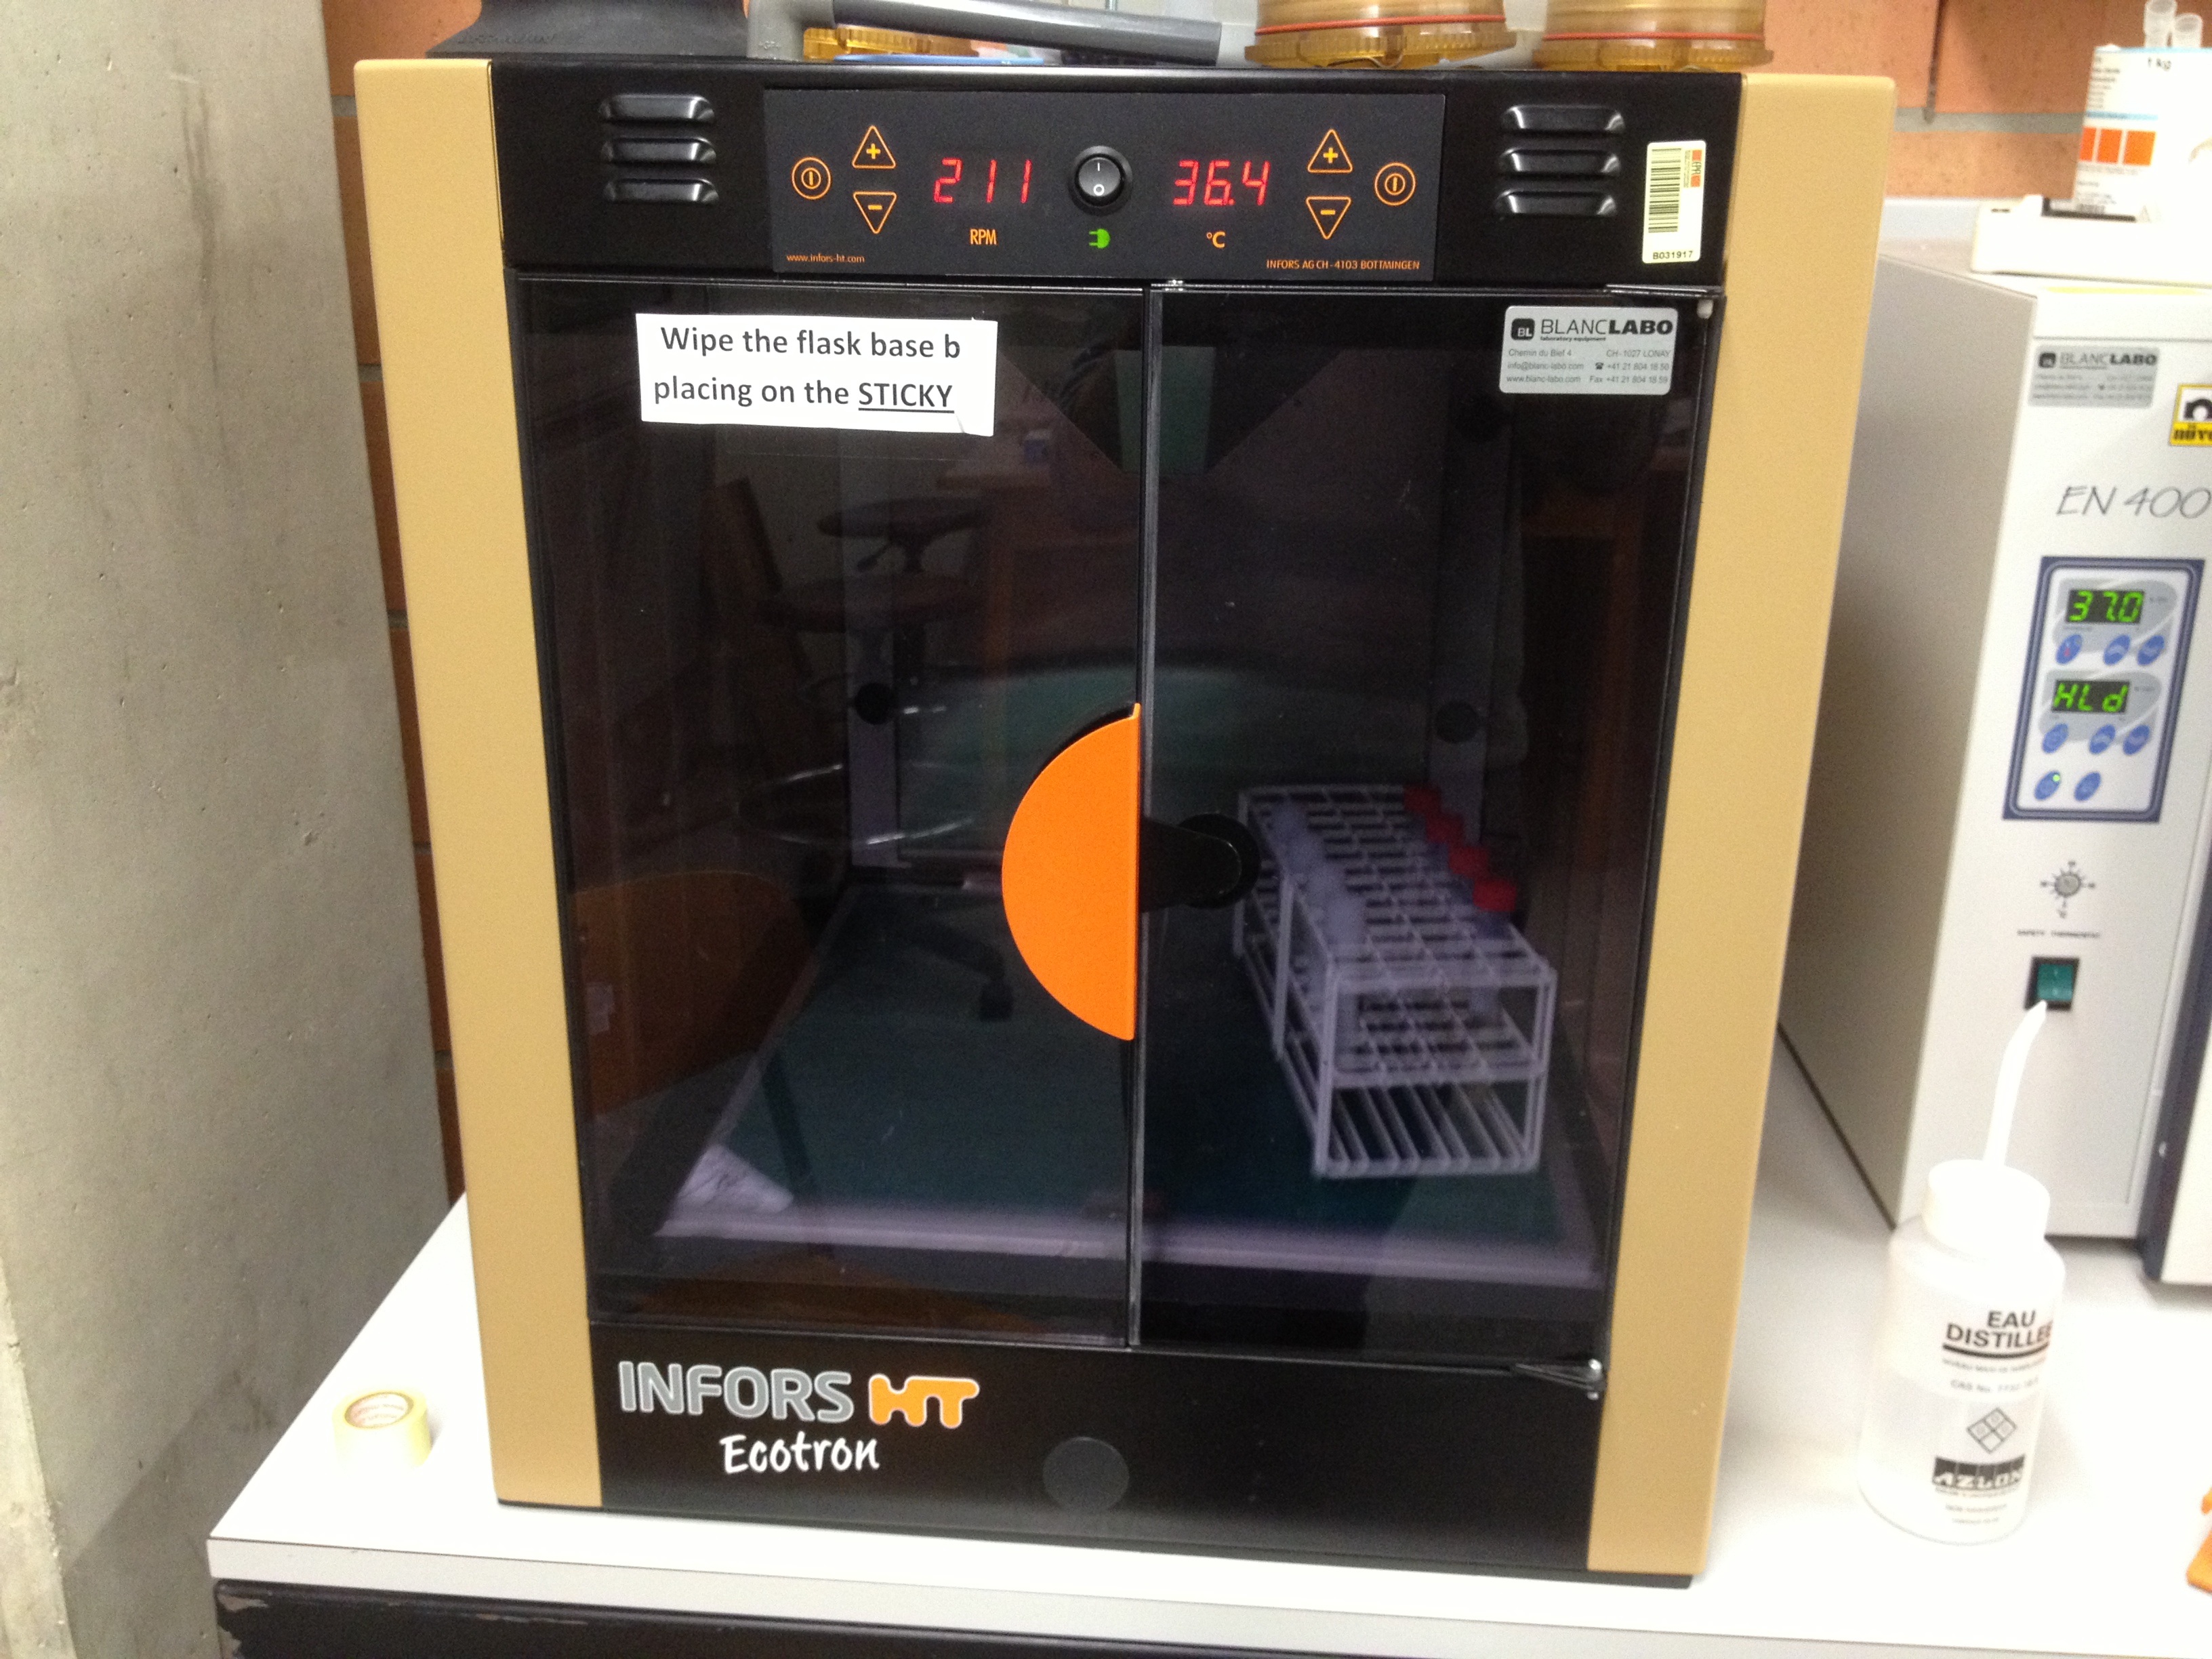
In the evening, inoculate the medium (containing the appropriate antibiotic) with either a bacterial colony or a chunk of glycerol stock. Grow overnight at 37°C with shaking at 220 rpm.

Day 2: Grow SeMet protein

    • Inoculate 10 ml of overnight culture into a fresh medium (200 ml) containing the appropriate antibiotic (e.g. ampicillin at 100 ug/ml final concentration). Grow at 37°C, 220 rpm until the OD600 reaches 0.3.
    • While the bacterial cells are growing, prepare the SelenoMet Medium Base (cf. Fig. 1)
    • Spin down in table-top centrifuge (e.g. Allegra X-15R (Beckman Coulter)) in 4 x 50 ml falcon tubes.
    • Resuspend with 20 ml of ready-to-use SelenoMet Medium Base taken from 1 litre prepared above
    • Grow at 37°C, 220 rpm until OD600 = 0.6.
    • Induce with IPTG (1 mM final concentration) and transfer to 18°C.

Day 3: Purification of the protein

Refer to protocol for purification of native protein.

selenomet_medium_baseselenomet_nutrient_mix

Secretion experiment with transfected cells

Day 1 : split cells

Starting point: T75 flask with GLUTag cells at a confluence > 80%

End point: 10 cm diameter Petri dish with GLUTag cells

  1. Transfer 5 ml of condition medium into a falcon tube.
  2. Throw away the rest of the condition medium (should be 15 ml)
  3. Wash cells with 10 ml PBS
  4. Add 3 ml trypsin and incubate for 5 min in the 37°C/5% CO2 incubator (check that cells are detached at the end of this short incubation and, if not, tap on the side of the flask to detach cells)
  5. During the trypsinisation, add 2 ml complete DMEM to the 5 ml condition medium
  6. At the end of the trypsinisation, add the 7 ml medium and triturate the cells. The total volume of cells is now 10 ml
  7. Add 6 ml complete DMEM to each of two 10 cm diameter Petri dishes
  8. Add 4 ml of resupspended cells to each of the Petri dishes
  9. Add the remaining 2 ml of resuspended cells to a new T75 flask containing 18 ml complete DMEM
  10. Incubate overnight in the 37°C incubator containing 5% CO2

Day 2 : Transfection day

Starting point:

  • 10 cm diameter Petri dish with attached GLUTag cells x 2

End point:

  • 10 cm diameter Petri dish with transfected GLUTag cells x 1
  • 10 cm diameter Petri dish with non-transfected GLUTag cells x 1

Reagents

  • Transfection agent: Lipofectamine-2000
  • plasmidic DNA
  • Optimem

Initial and final conditions

  • Initial medium volume: 10 ml complete DMEM
  • Final medium volume: 6 ml complete DMEM + 1.5 ml Optimem
  • Initial pDNA concentration: 0
  • Final pDNA concentration: 0.04 ug/cm^2, i.e. 3 ug/75 cm^2
  • Initial Lipofectamine-2000 concentration: 0
  • Final Lipofectamine-2000 concentration: 12 ul/ug pDNA, i.e. 36 ul/75 cm^2

Parameters

pDNA stock concentration: 2 ug/ul

Procedure (in hood)

  1. Pipet 750 ul of Optimem in each of two eppendorf tubes
  2. Pipet 3 ug/(2 (ug/ul)) = 1.5 ul pDNA into one tube
  3. Pipet 3 x 12 ul/ug = 36 ul Lipofectamine-2000 into the other tube
  4. Wait 5-10 min
  5. Transfer the content of the tube containing the pDNA into the tube containing the Lipofectamine-2000
  6. Incubate in the hood for 20 min
  7. Pipet dropwise evenly on the 10 cm diameter Petri dish containing the cells to be transfected
  8. Put the cells back in the 37°C/5% CO2 incubator

Day 3 : Transfer cells into 24-wells plate

Starting point: Petri dish with transfected cells
End point: 24-wells plate with transfected cells

  1. Dilute matrigel 100 x with cold DMEM (without any additives such as L-glutamine, FBS, pen/strep).
  2. Pipet 250 ul diluted matrigel into each well
  3. Incubate the plate for 30 min in the incubator
  4. In the meantime, wash and trypsinise the cells with 2 ml trypsin (6 cm dish). Centrifuge and resuspend in 13 ml DMEM (6 cm dish).
  5. Throw away the matrigel
  6. Pipet 1 ml cells into each well

Day 4 : Stimulate secretion

Starting point: 24-well plates containing attached transfected and untransfected GLUTag cells
End point: Frozen supernatants from stimulated cells

    1. Prepare washing solution: extracellular solution + 10 mM Glucose + 1 mg/ml BSA (Bovine serum albumin). E.g.: 50 ml extracellular solution + 90 mg Glucose (10 mM final concentration) + 50 mg BSA
    2. Prepare stimulating solutions:
      A: 4 ml washing solution (negative control)
      B: 4 ml washing solution + 4 ul forsklin at 10 mM (1000 X) + 4 ul IBMX at 100 mM (1000 X) (positive control)
      C: 4 ml washing solution + 0.4 ul stimulating agent
      D: 4 ml washing solution + 4 ul stimulating agent
    3. for (j in 1:3) {
      for (i in 1:4) { # 4 rows in a 24-wells plate
      empty row i
      fill row i with 400 ul washing solution
      }
      }
    4. Empty row. Add 250 ul condition 3 wells at a time (the 3 wells containing the same condition)
    5. Incubate 2h at 37°C
    6. 30 min before the end of the incubation, prepare tubes. The total number of samples being N, we’ll need 2 x N tubes. The first set of tubes will be stored on wet ice (water ice) and the second set of tubes will be stored on dry ice (carbon dioxide ice). Both sets of tubes are labelled from 1 to N and the tubes in the second set are labelled with a barcode going from X to X + N – 1 (X being any integer).
    7. At the end of the incubation, transfer the plates from the incubator to wet ice and transfer the supernatants in the first set of tubes
    8. Spin the tubes for 5 min at 2000 rpm at 4°C
    9. Transfer the supernatant (be careful not to transfer any pellet) from the first set of tubes to the second set of tubes
    10. Store at -80°C until ready for analysis

Cristian Riccio, Laboratory of Prof. Gribble and Dr. Reimann, Institute of Metabolic Science

Test d’expression de protéine à petite échelle

Lausanne, le 28 février 2014

Souvent, lorsqu’on travaille avec une nouvelle construction plasmidique (construct), nous voulons vérifier que les bactéries qui ont incorporé le plasmide produisent bel et bien la protéine dont le gène se trouve sur le plasmide. Pour cela, il est conseillé d’effectuer un test d’expression de protéine à petite échelle avant de passer à une échelle plus grande, nécessaire à la production d’une quantité importante de protéine. Dans le cas où la protéine n’est pas exprimée, cela peut indiquer un problème avec le plasmide ou bien que la protéine est dégradée (en particulier dans le cas d’une expression dans des cellules eucaryotes, où le protéasome dégrade les protéines mal pliées) et il faut résoudre ce problème avant de passer à une expression à grande échelle.

Point de départ de l’expérience: colonies sur boîte d’agar.

Point d’arrivée: gels de polyacrylamide produits par SDS-PAGE et indiquant le degré d’expression de la protéine.

Marche à suivre

1. Choisir une ou plusieurs colonies en essayant d’éviter les colonies satellites (cf. lexique pour définition).  Choisir plusieurs colonies augmente les chances d’obtenir au moins un résultat positif. Les étapes suivantes sont décrites pour une colonie.

2. Inoculer 4 tubes de culture de 12 ml contenant 2 ml de milieu de culture LB + antibiotique à partir d’une seule colonie. En outre, il est conseillé d’avoir un contrôle négatif et un contrôle positif pour l’expression. Pour le contrôle positif, utiliser un stock de glycérol dont on sait qu’il exprime une protéine (n’importe laquelle) et pour le contrôle négatif utiliser des bactéries non transformées. Enfin, utiliser un tube supplémentaire inoculé avec n’importe quelle colonie. Ce tube servira à mesur la densité optique (DO) à 600 nm.

3. Incuber avec rotation à 37°C pendant quelques heures jusqu’à ce que la densité optique à 600 nm du tube supplémentaire atteigne au moins 0.6. A ce moment-là, les 4 tubes inoculés avec la même colonie prennent des chemins différents:

a. Un tube, marqué iNI37, reste à 37°C sans aucun traitment. i va de 1 au nombre de colonies sélectionnées.

b. Un autre tube, marqué iI37, est induit à l’IPTG (1 mM de concentration finale) et reste à 37°C.

c. Un troisième tube, marqué iNI18, est déplacé à 18°C.

d. Le dernier tube, enfin, marqué iI18, est induit avec de l’IPTG et déplacé à 18°C. C’est ce dernier tube qui donne normalement l’expression maximale, en raison de l’induction et du déplacement à 18°C. A cette dernière température, les bactéries cessent de se multiplier et peuvent focaliser leur énergie sur la production de la protéine d’intérêt.

4. Laisser incuber au moins 3,5 heures aux températures respectives. Si c’est très tard et que vous voulez rentrer à la maison absolument, vous pouvez aussi laisser incuber du jour au lendemain.

5. Après l’incubation, transférer 1 ml de culture dans un tube eppendorf de 1,5 ml.

6. Centrifuger 10 min à 15’000 rpm.

7. Jeter le surnageant.

8. Resolubiliser le culot dans 200 µl de BugBuster. Cette solution va lyser les cellules.

9. Centrifuger 10 min à 15’000 rpm.

10. Transférer le surnageant (la partie soluble) dans un autre eppendorf de 1,5 ml.

11. Aliquoter 30 µl de partie soluble dans un autre tube eppendorf contenant 30 µl de solution Lämmli 2x (solution de chargement pour le SDS-PAGE).

12. Resuspendre le culot (la partie insoluble) dans 50 µl de solution Lämmli 2x.

13. Chauffer les tubes contenant le Lämmli à 95°C pendant 5 min et charger dans des gels de polyacrylamide.

Il est aussi possible d’utiliser des erlenmeyer au lieu des tubes de culture.


Lexique

Colonie satellite: colonie de bactéries non transformées qui réussit à pousser sur de l’agar contenant de l’antibiotique en raison de la dégradation de l’antibiotique par une colonie voisine qui exprime la résistance à l’antibiotique et dégrade l’antibiotique qui l’entoure.

Transformation de bactéries avec de l’ADN exogène

Protocole (version courte en PDF)

27.02.14 Les plasmides ont été ajoutés aux bactéries et se lient à la surface de la membrane plasmique.


27.02.14 Les plasmides ont été ajoutés aux bactéries et se lient à la surface de la membrane plasmique.
27.02.14 Une bouteille d'agar solide, avant d'être fondue.
27.02.14 Une bouteille d’agar solide, avant d’être fondue.
27.02.14 Des boîtes de Pétri d'agar en train de sécher autour d'une flamme de bec Bunsen.
27.02.14 Des boîtes de Pétri d’agar en train de sécher autour d’une flamme de bec Bunsen.
27.02.14 Les bactéries, après transformation, sont incubées avec rotation à 37°C pour leur laisser le temps d'exprimer la résistance à l'antibiotique.
27.02.14 Les bactéries, après transformation, sont incubées avec rotation à 37°C pour leur laisser le temps d’exprimer la résistance à l’antibiotique.
50 ul de bactéries sont étalées sur les boîtes de Pétri autour du feu.
Les boîtes de Pétri sont incubées du jour au lendemain à 37°C dans le thermostat.


Lausanne, le 27 février 2014

La transformation des bactéries avec un plasmide est utile si nous voulons exprimer un gène dans une souche de bactéries, par exemple un gène codant pour une protéine. Dans mon travail au Laboratoire de biologie structurale et biophysique à l’EPFL, je suis souvent amené à transformer des bactéries avec un plasmide. Aujourd’hui par exemple, j’aimerais transformer 4 plasmides contenant chacun le gène de la protéine X avec une mutation différente. J’aimerais transformer ces plasmides dans la souche E. coli B834(De3) parce que cette dernière se prête particulièrement bien à l’expression de protéines. J’utilise les bactéries en quelque sorte comme des petites usines pour produire ma protéine d’intérêt. D’autres souches de E. coli se prêtent mieux à d’autres fins, e.g. la souche DH5α se prête bien à la production de plasmide afin de l’extraire par préparation de plasmide (miniprep, midiprep ou maxiprep) pour augmenter notre stock de plasmide.

Aujourd’hui, je procèderai à une transformation chimique des bactéries. Il existe aussi la transformation électrique (par électroporation) des bactéries, discutée dans un autre post.

Marche à suivre

1. Sortir les bactéries compétentes B834(De3) du congélateur à – 80 °C et les faire dégeler sur de la glace. Faire de même avec les plasmides stockés à – 20 °C.

2. Pour chaque transformation, transférer 50 µl de bactéries compétentes dans un tube eppendorf de 1,5 ml.

3. Ajouter 2 µl de plasmide à une concentration de 15 ng/µl. La quantité finale de plasmide doit se situer entre 10 ng et 100 ng. Dans le cas présent, la mass finale de plasmide est de 30 ng.

4. Incuber le mélange de plasmide et de bactéries compétentes pendant 30 minutes sur la glace.

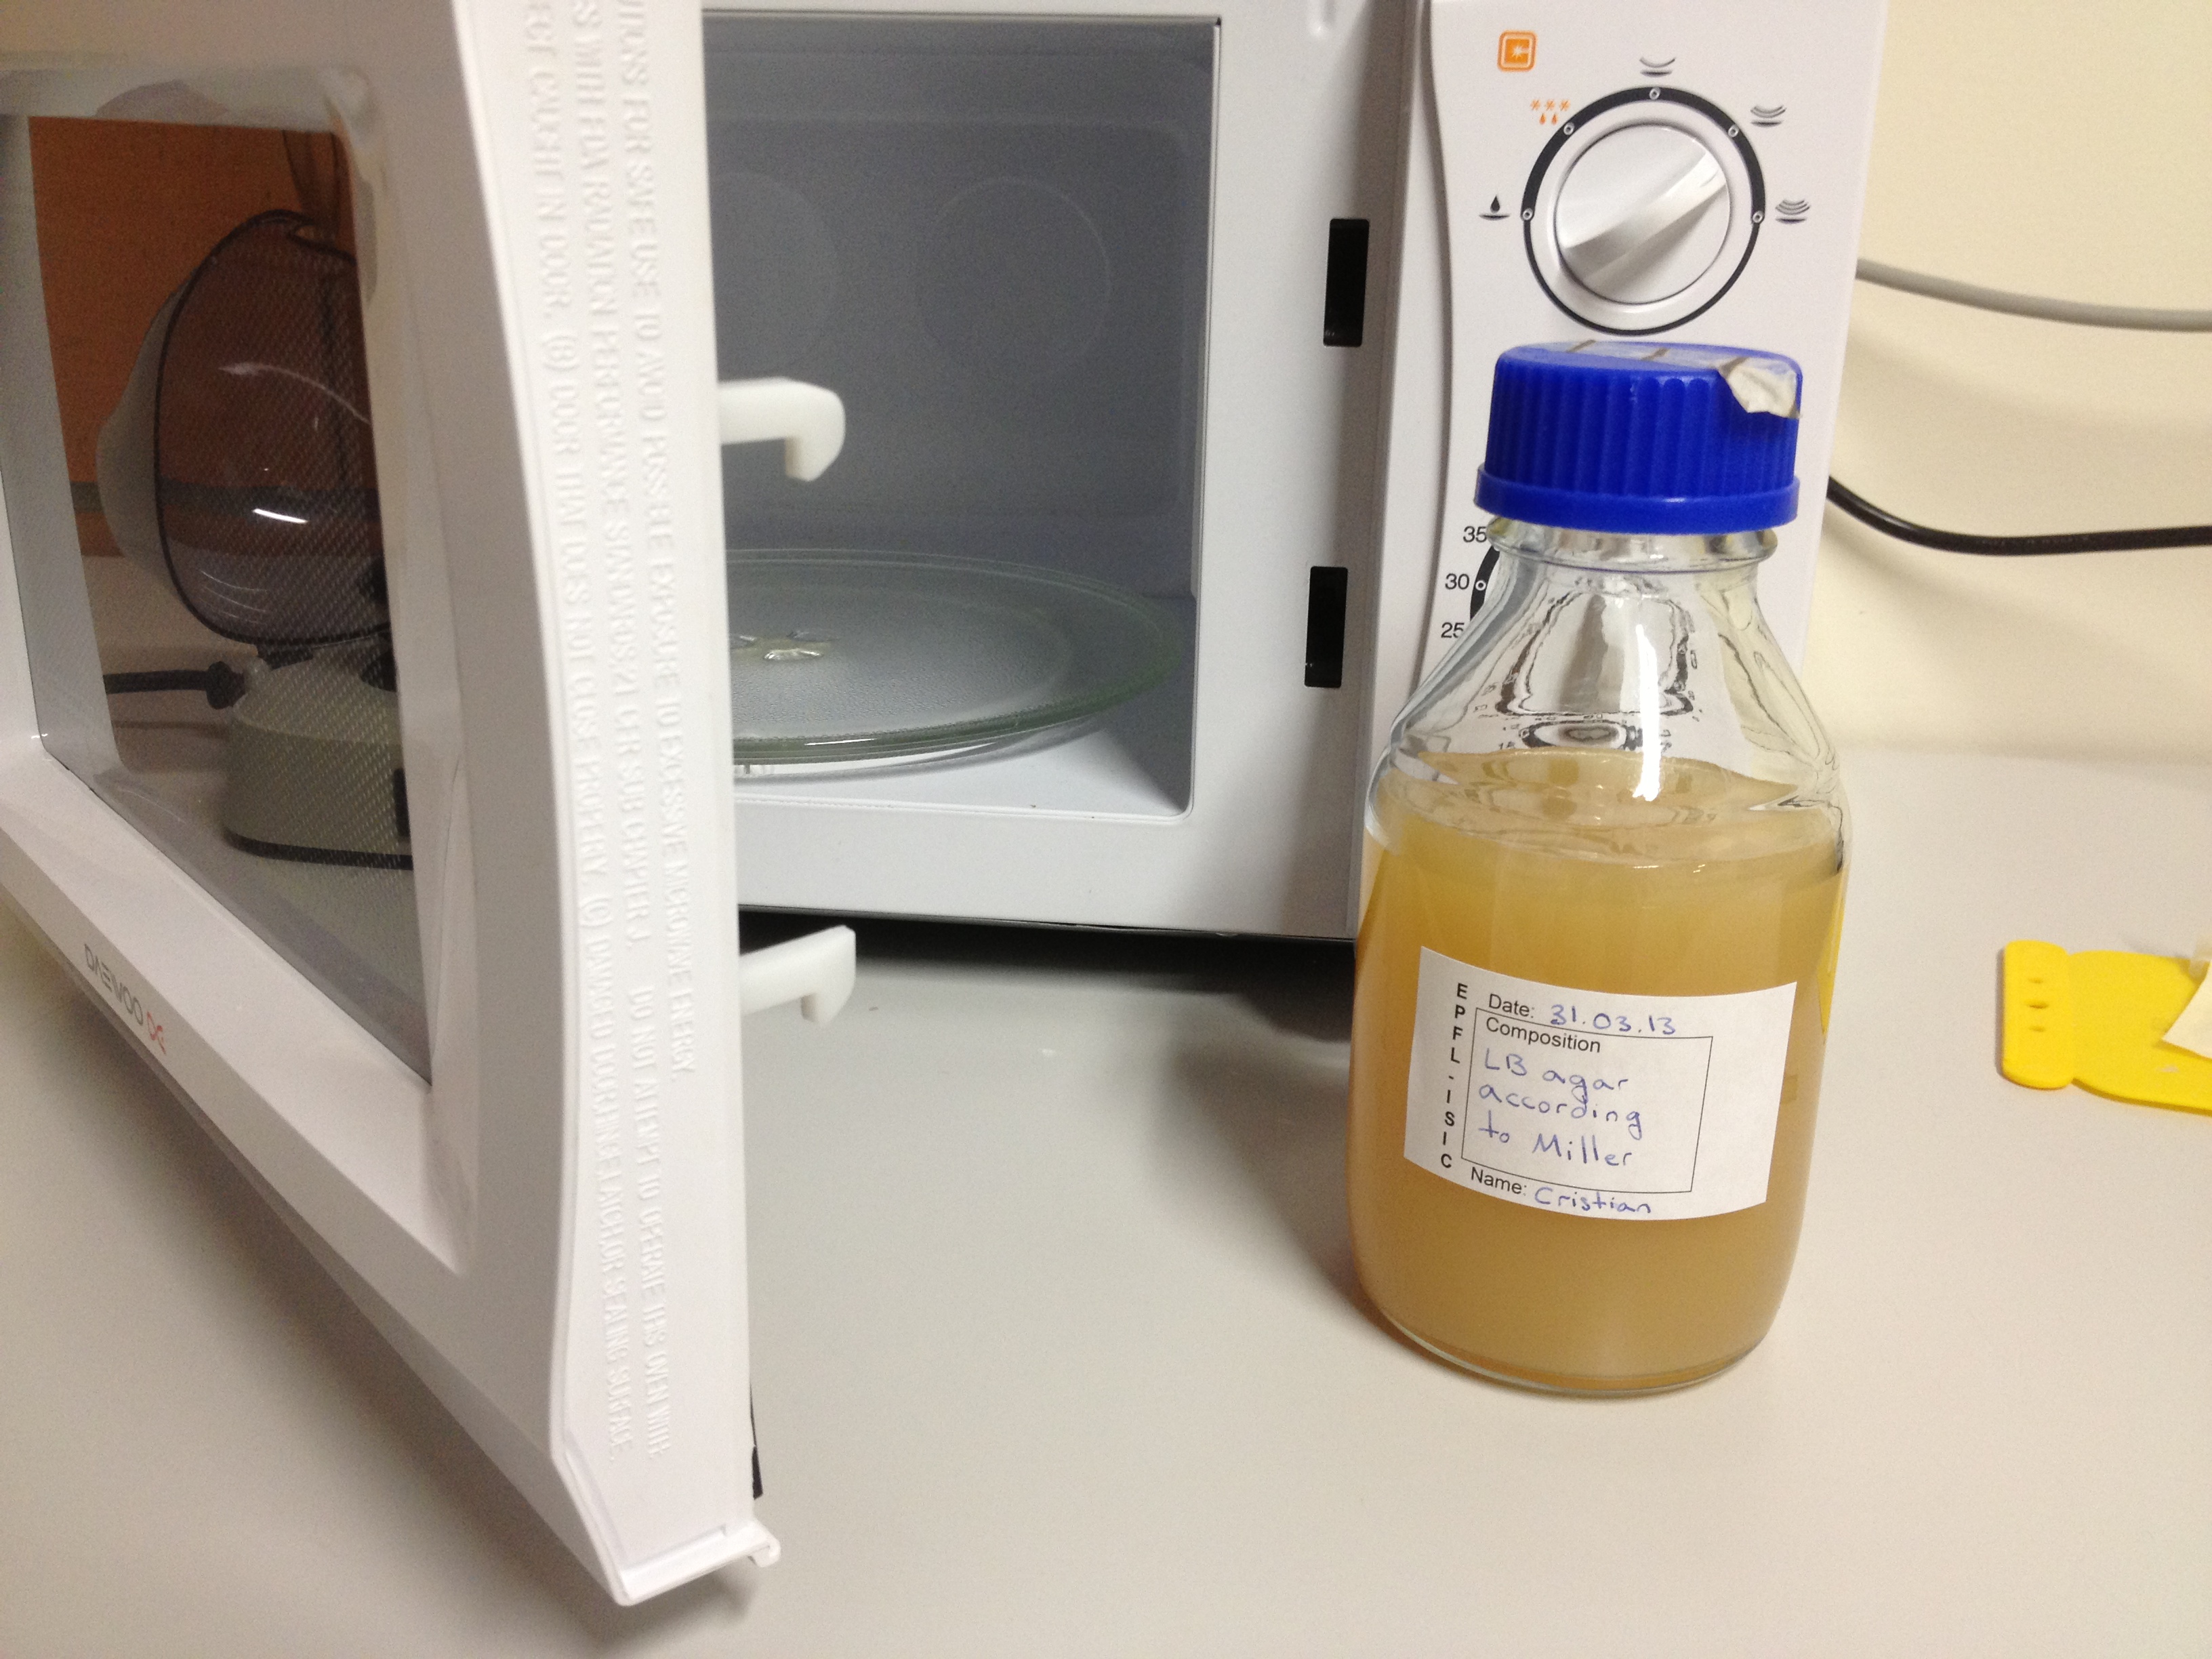
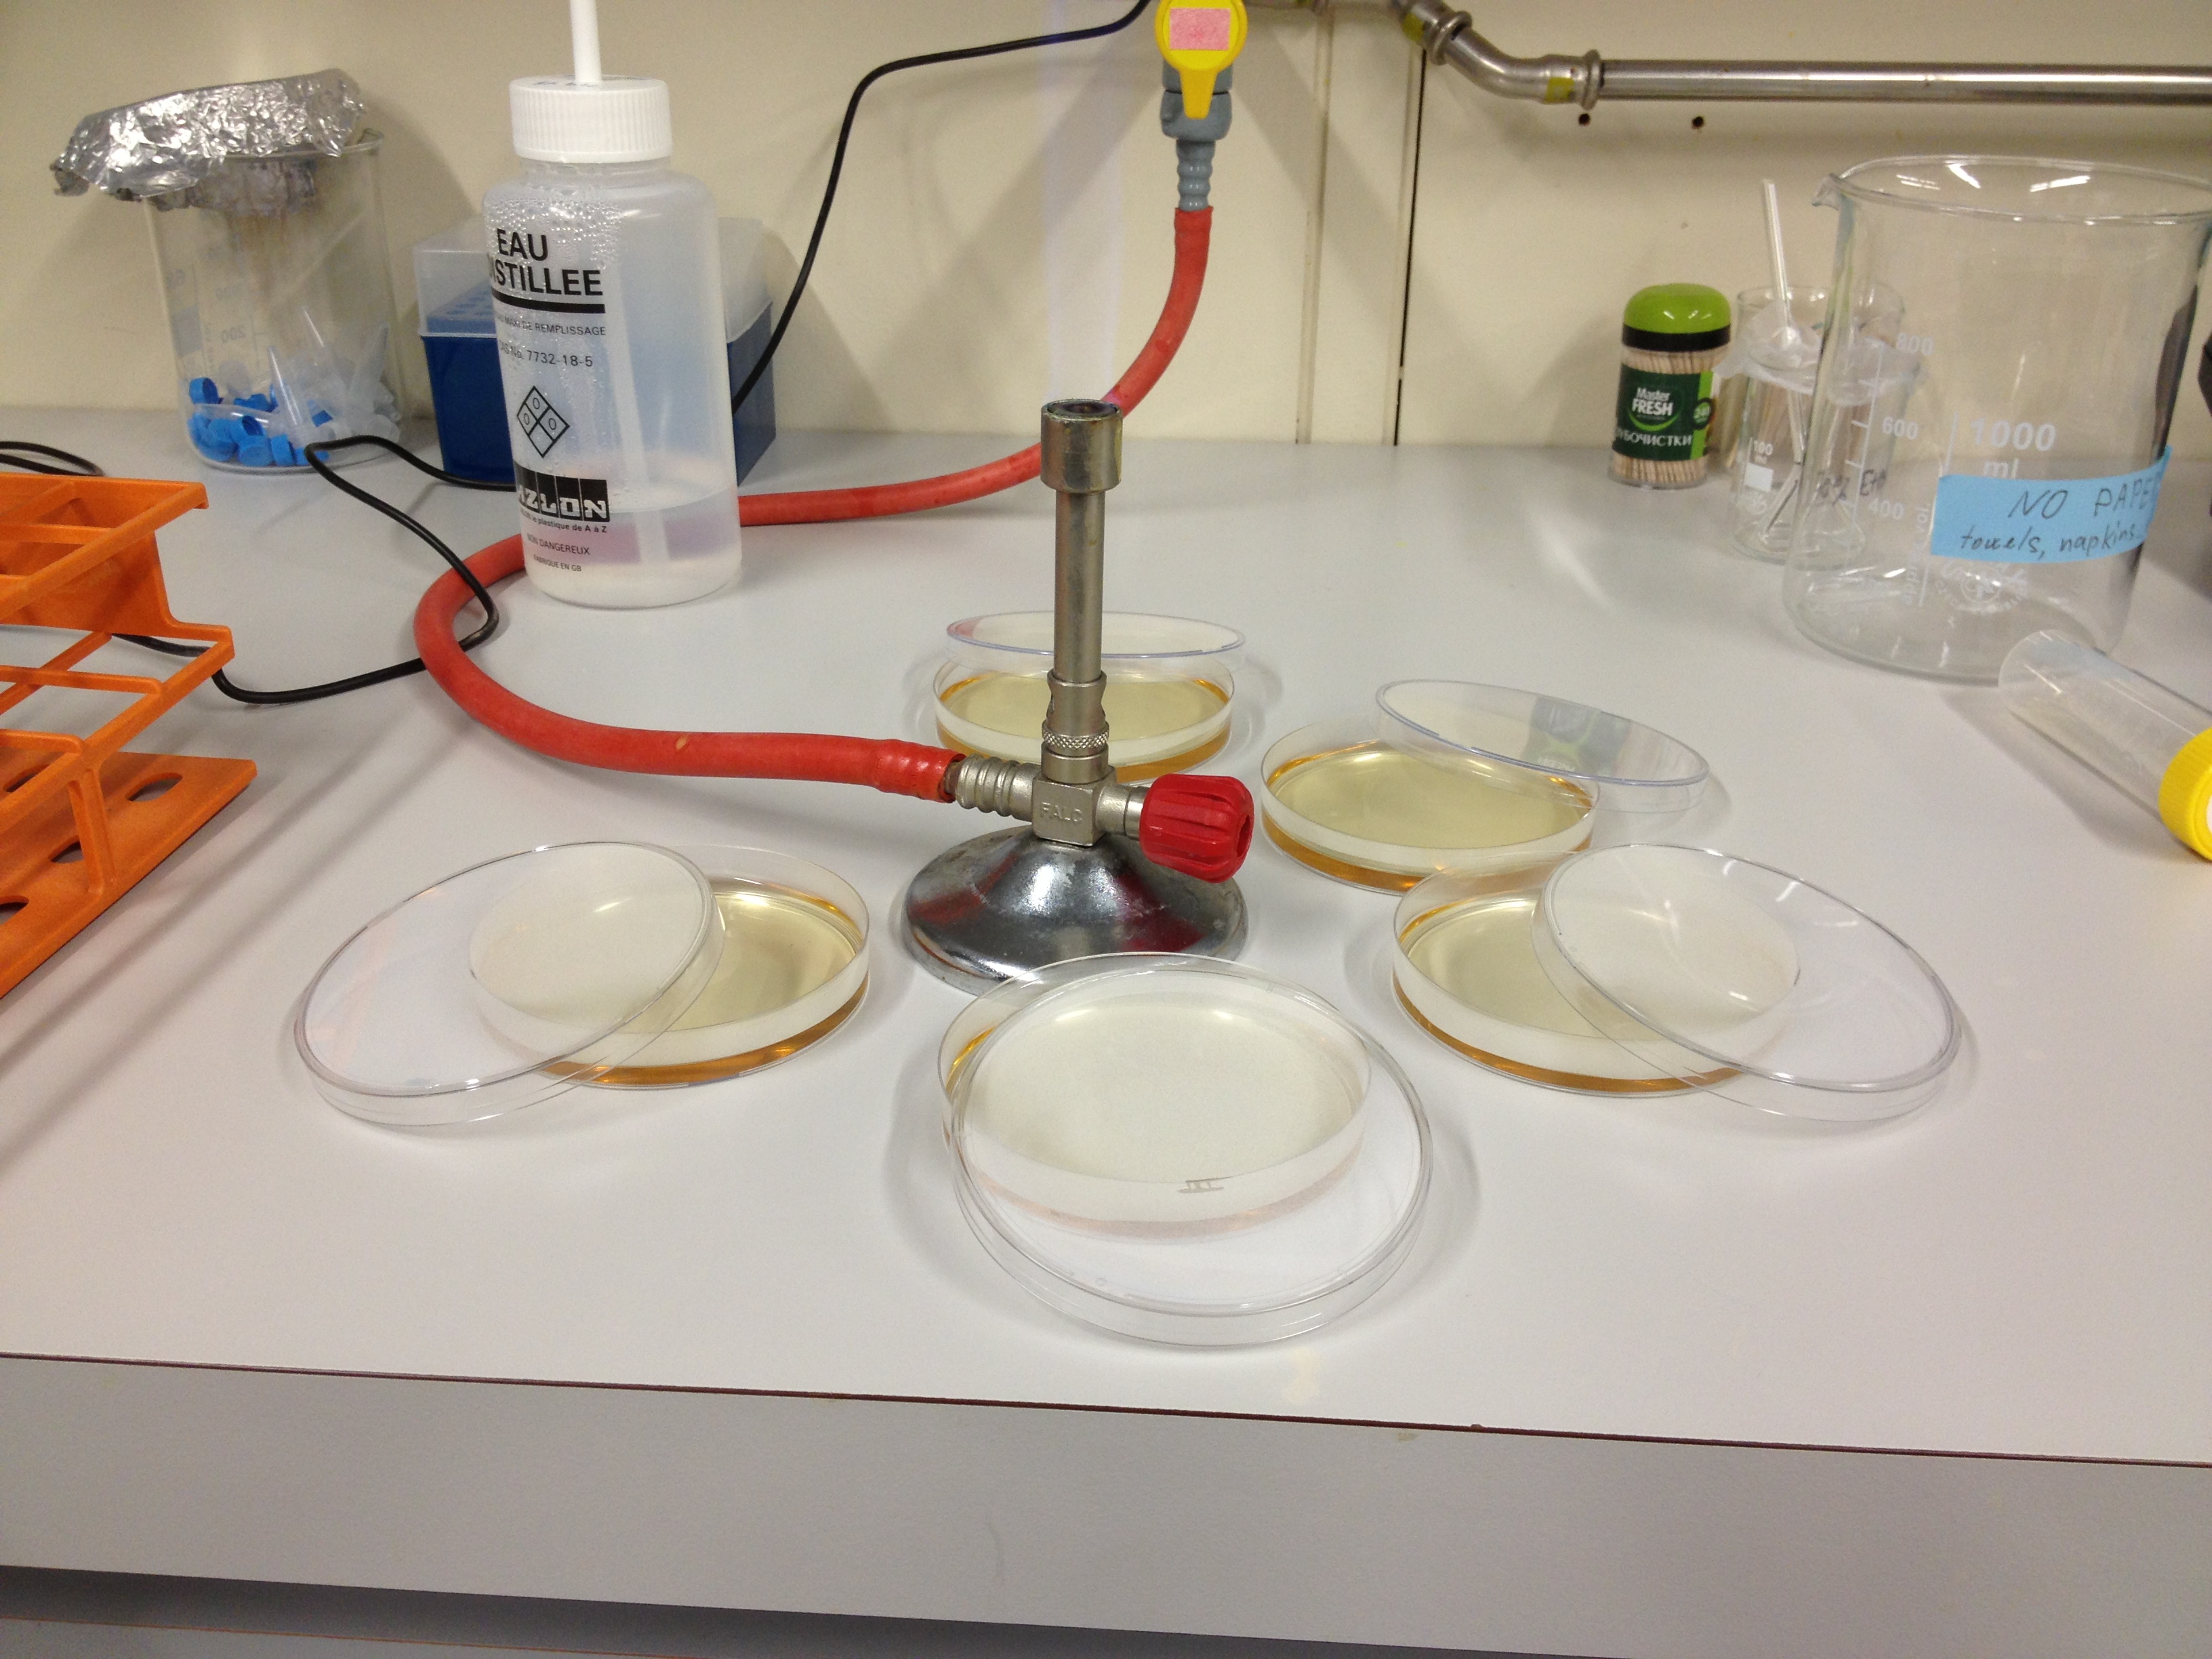
5. Pendant les 30 minutes d’incubation, nous allons préparer des boîtes d’agar contenant de l’antibiotique (ici de l’ampicilline). Si les boîtes sont déjà prêtes, les sortir du frigo et les mettre dans le thermostat à 37°C. Dans le cas contraire, nous allons préparer des boîtes d’agar fraîches. D’abord, faire fondre l’agar au micro-ondes. Perso, je fais fondre graduellement, i.e. pendant 2 minutes séparées d’un coup d’oeil pour monitorer l’avancement de la fusion et l’état du micro-ondes. Attention à que le bouchon ne soit pas fortement fermé (tight). Le bouchon doit pouvoir danser sur la bouteille, i.e. être lâche (loose), afin que l’air puisse sortir de la bouteille pendant l’augmentation de température (rappel de la loi des gaz parfaits: PV = nRT -> si la température augmente et que la bouteille est fermée (V constant), la pression dans la bouteille augmente et celle-ci risque d’exploser!).  Après fusion de l’agar, en verser une quantité suffisante dans des tubes falcon de 50 ml (environ 20 ml par boîte de Pétri). Attendre que la température baisse suffisamment avant d’ajouter l’antibiotique. En effet, si l’antibiotique est ajouté trop tôt, la température élevée risque de le détruire. D’un autre côté, si nous attendons trop avant d’ajouter l’antibiotique, l’agar risque de se solidifier. Les étapes suivantes se passent près d’une flamme au bec Bunsen afin de ne pas contaminer l’agar avec des bactéries de l’air. Aujourd’hui, je prépare 5 boîtes d’agar avec antibiotique et je verse donc 100 ml d’agar dans 2 tubes falcons de 50 ml. Après que la température soit descendue suffisamment (un bon indice est qu’en touchant le tube avec l’avant bras, la sensation ne doit pas être douloureuse), j’ajoute 50 µl d’antibiotique 1000 x dans chaque tube. Je verse ensuite l’agar liquide dans les boîtes autour de la flamme et je les laisse ouvertes afin qu’elles sèchent.

6. Après les 30 minutes d’incubation sur glace, nous passons au choc thermique: chauffer les bactéries pendant 5 minutes à 42 °C sur un bloc chauffant.

7. Remettre les tubes sur glace pendant 2 minutes.

8. Ajouter 1 ml de milieu LB dans le tube eppendorf de 1,5 ml et transférer le tout (1,057 ml) dans des tubes de culture de 12 ml à incuber pendant 30-60 min à 37 °C à 220 rpm. Cette période de temps permet aux bactéries d’exprimer la résistance à l’antibiotique codée sur le plasmide.

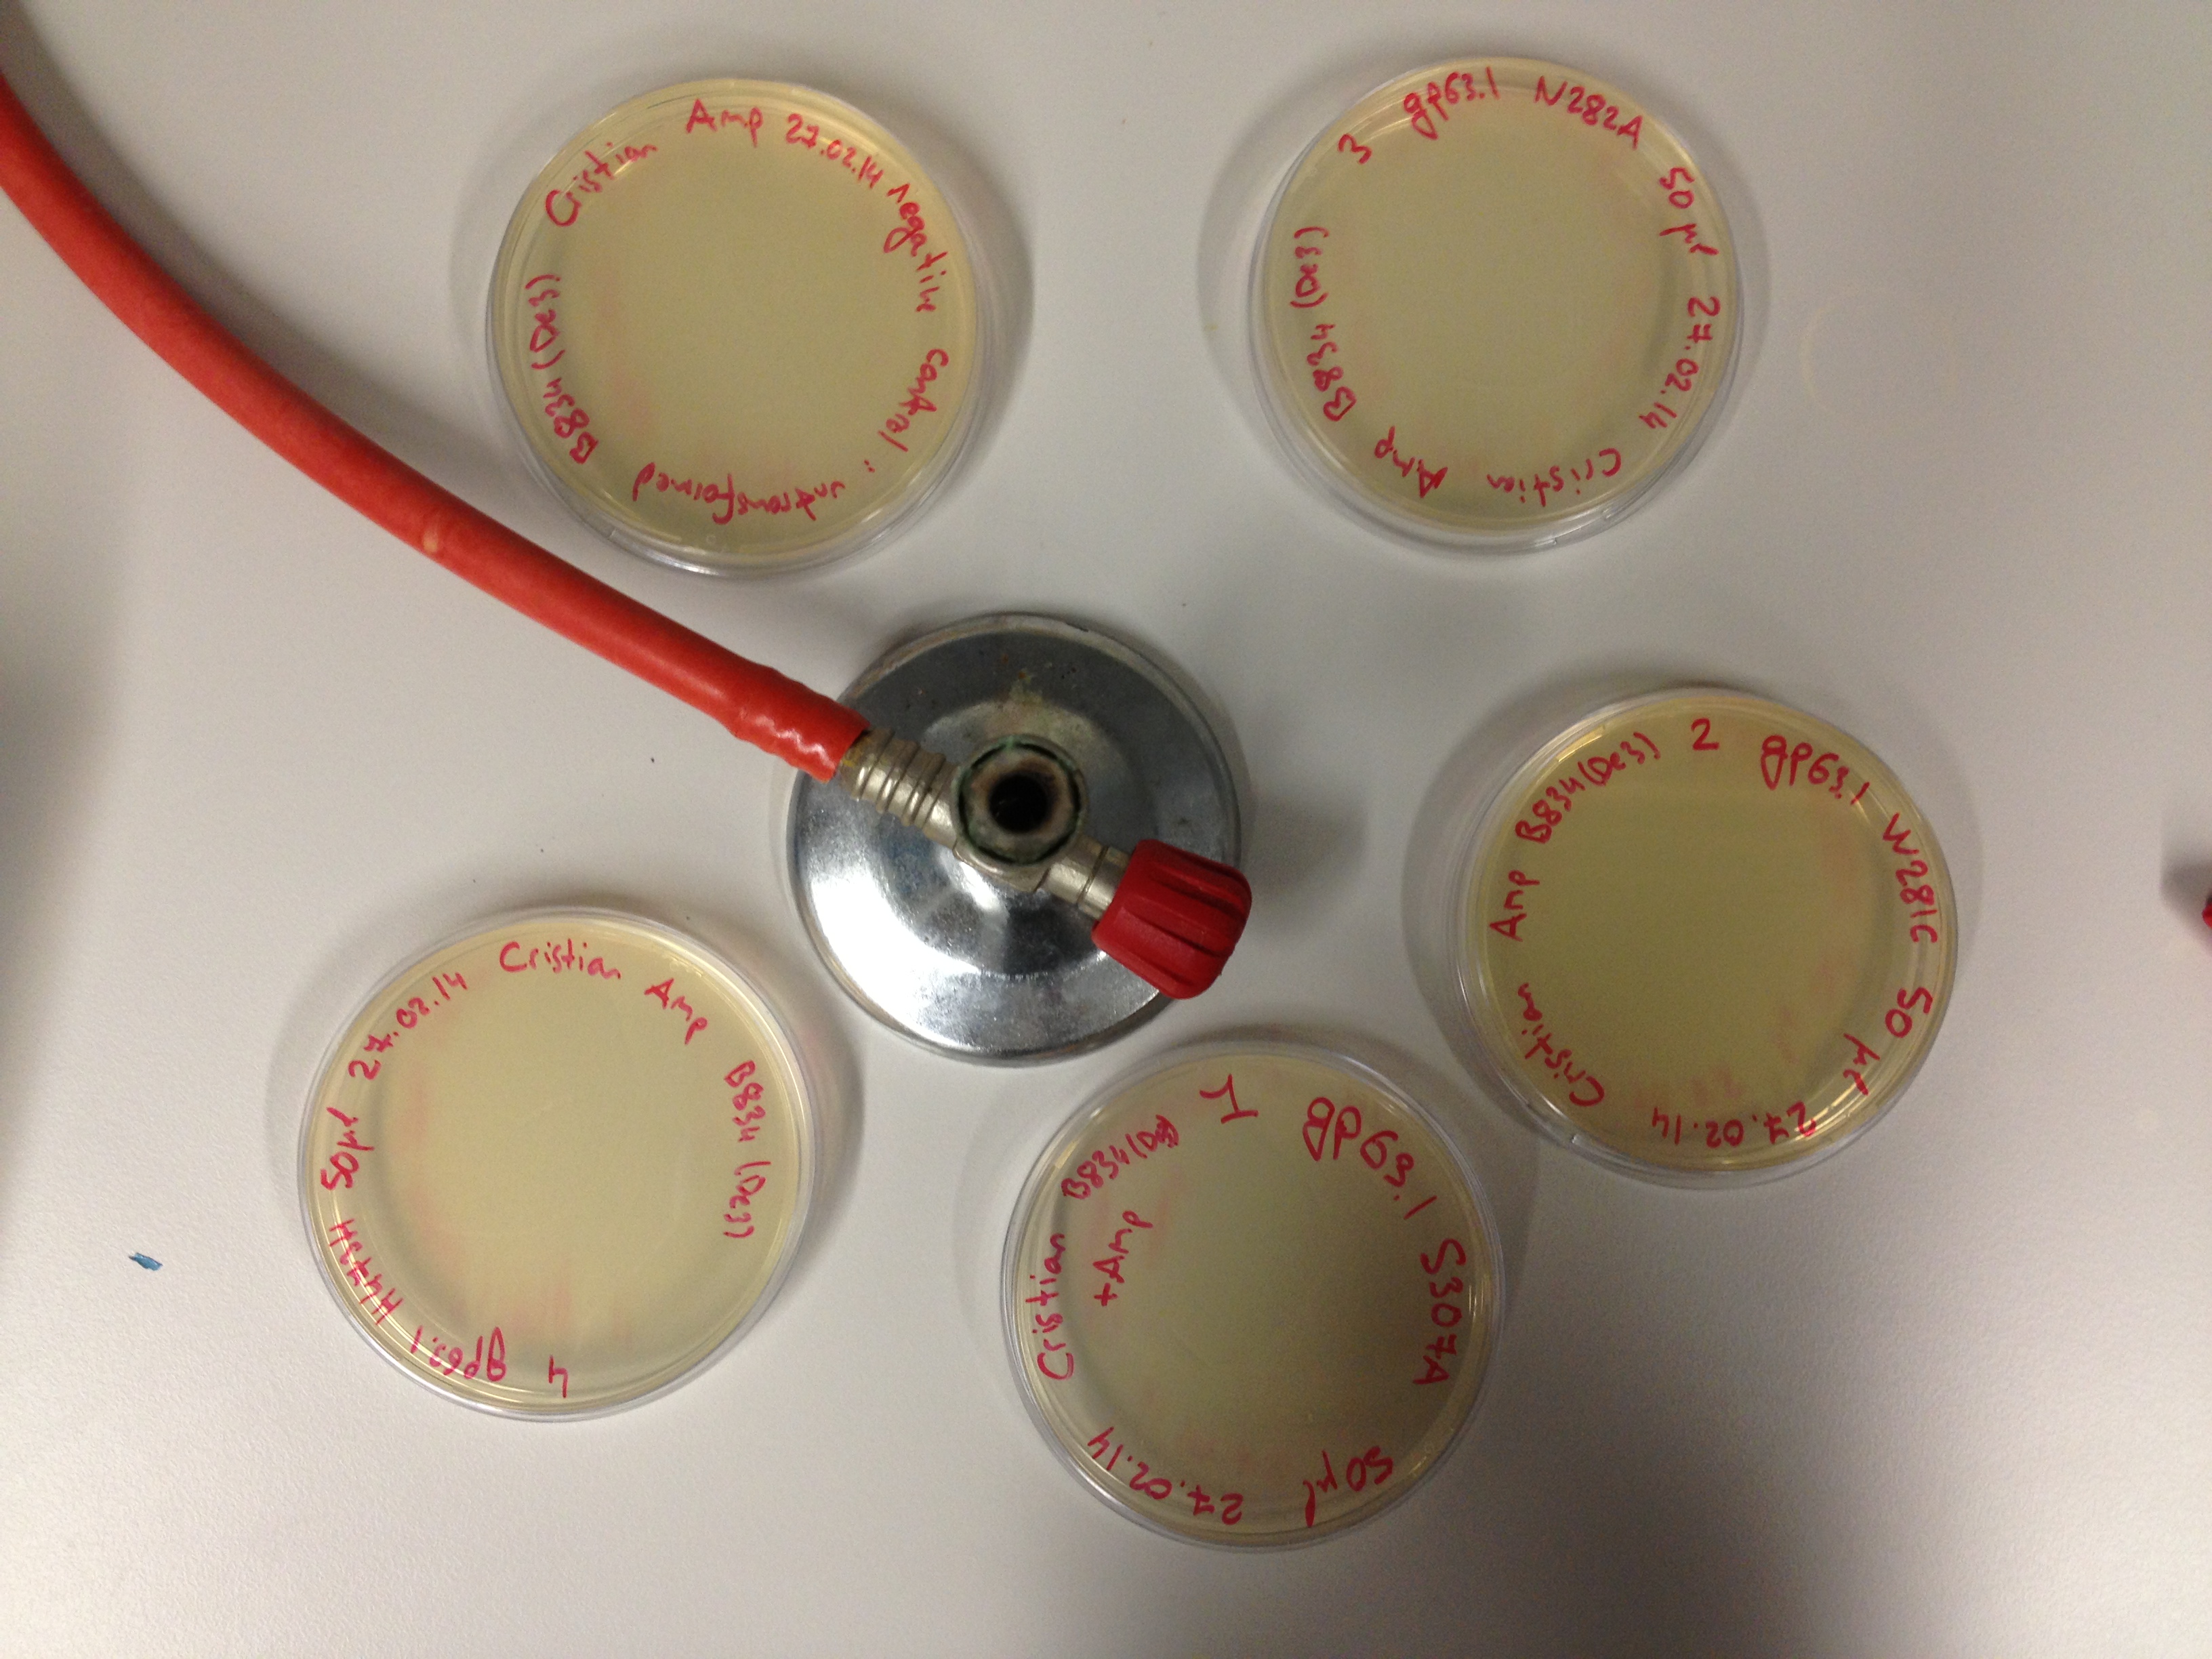
9. Etaler 50 µl sur les boîtes d’agar contenant l’antibiotique. Seules les bactéries ayant incorporé l’antibiotique formeront des colonies pendant la nuit.

10. Incuber du jour au lendemain à 37°C dans le thermostat.

Lausanne, le 28 février 2014

9. Vérifier la présence de colonies dans les boîtes sur lesquelles des bactéries transformées ont été étalées. Vérifier que le contrôle négatif, la boîte sur laquelle des bactéries non transformées ont été étalées, ne contienne pas de colonies.

28.02.14 Des colonies ont poussé pendant la nuit sur toutes les boîtes sur lesquelles des bactéries transformées ont été étalées. Le contrôle négatif, sur laquelle des bactéries non transformées ont été étalées, ne contient pas de colonies.

ingrédients

– des bactéries “compétentes”, i.e. facilement transformables par de l’ADN exogène. Les bactéries doivent soit être sensibles à un antibiotique, soit être auxotrophes.

– de l’agar en poudre

– un plasmide portant un gène de sélection. e.g. un gène produisant de la beta-lactamase donnant la résistance à l’antibiotique ampicilline ou un gène dont le produit permet la synthèse d’un nutriment rendant les bactéries qui l’expriment prototrophes.

– en fonction du gène de sélection: antibiotique ou milieu sélectif pour bactéries prototrophes.